SADDLE FIT
Do you need an event speaker?
Adrienne is available for guest speaking or zoom/facetime meetings. She is also available to travel for fittings and clinics.
Videos – How I Approach Saddle Fit
How to take Tracings
You Will Need:
- Flexicurve Ruler (24″ Architectural ruler found at most office supply stores.)
- Twist-tie or small zip-tie
- Manila Folder
- Regular Pen
- Felt Tip Pen
Process:
- It can be helpful to have a handler for the horse to get accurate tracings and photos.
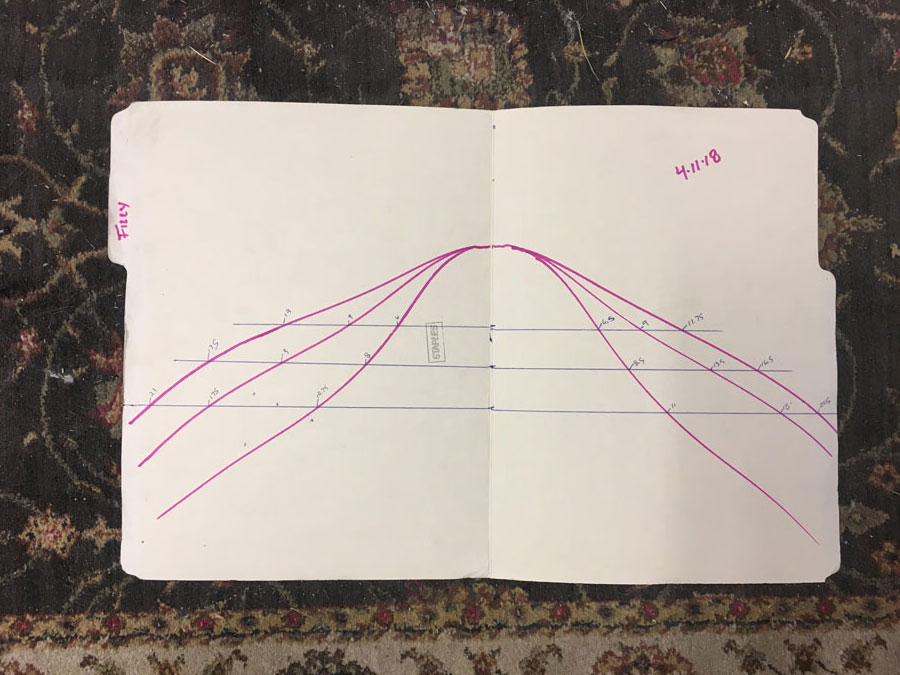
- With the regular pen, write the horse’s name and today’s date on the upper right corner of the folder.
- Place and twist the twist-tie in the middle of the flexicurve to mark the mid-point.
- Have the horse stand as square as possible on level ground.

First Tracing
- Place the flexicurve 3 fingers behind the shoulder blade with the twist tie centered in the middle of the horse’s back.
- Gently press down on each side of the flexicurve evenly along both sides of the horse’s back. Pick up the flexicurve from the center (twist-tie) and lay it on the fold of the manila folder. Make sure the left side of the horse is on the left side of the manila folder, right on right. Align the twist tie with the crease in the middle of the folder. Trace the inside of the curve with the felt marker. Mark this tracing “1”.
- Repeat this step to make sure you get the same tracing.
- Repeat as needed until you do.
Second Tracing
- Press the flexicurve at the lowest point of the wither coming into the spine and align the twist-tie in the middle. Press evenly on both sides of the flexicurve. Lift from the twist-tie and place the top of the previous tracing. The twist-tie should be in the same place on the manila folder as with Tracing “1”. Trace the inside as above and mark this as “2”.
Third Tracing
- Find the last rib (T-18) and repeat as above marking this tracing as “3”.
If you have any questions or difficulties, please call me: 208-908-1408


